Thursday, August 16, 2012

EastMont Tomato Festival!


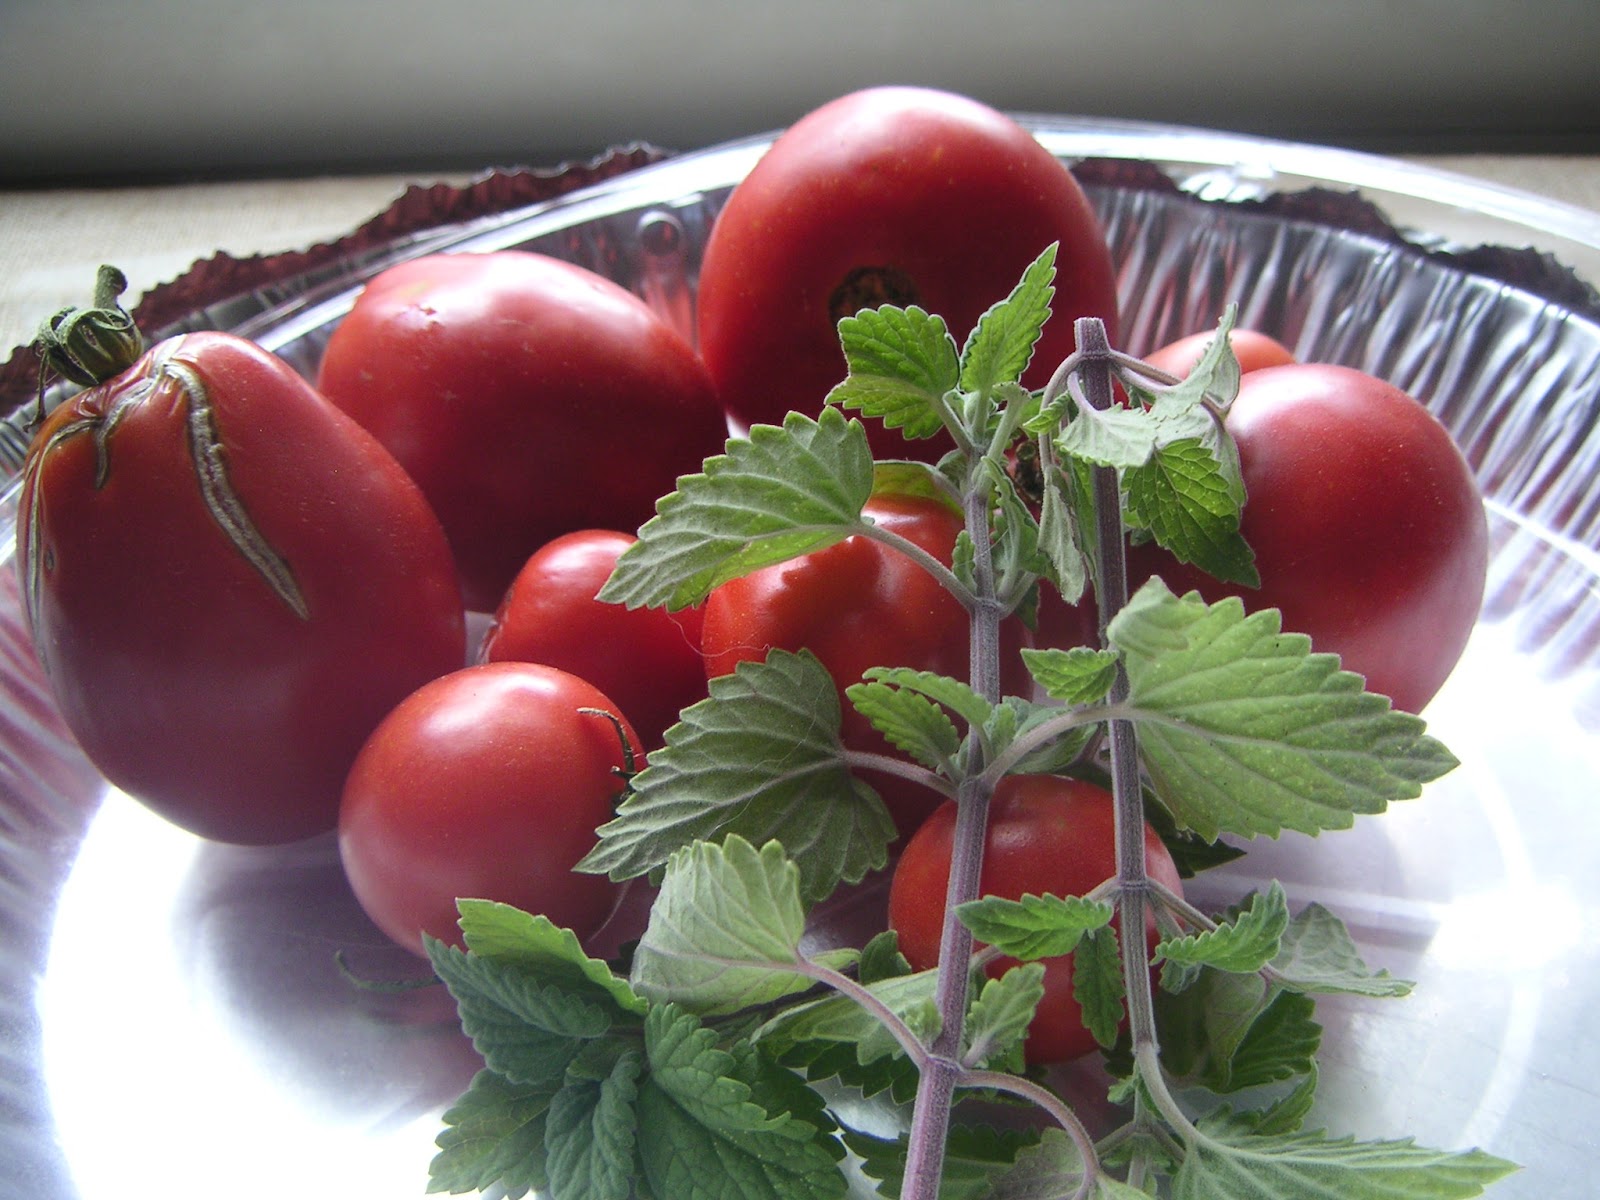
Just taking a minute to remind all of my pals in southwest Virginia and thereabouts that it's Tomato Festival time again! Already, you ask? Yep, it's been a year since the last one and now's your chance to enjoy plates of fried green tomatoes, perfectly seasoned and hot out of the pan. I'm especially excited to go this year because I've been invited to judge tomato submissions - good thing I've got a clean white shirt!

This Saturday, from 10 to 4, at the Meadowbrook Center in Shawsville, they'll have live music pretty much all day and there's a Tomato Pageant as well as a silent auction, plus vendors with lots of goodies, and plenty of that ultimate Southern favorite, the Tomato Sandwich!


Here's the place to find out more about the festival and download contest entry forms: http://tomatofestival.wordpress.com/

You could be the next Tomato King or Queen, or your winning recipe could find its way into the festival cookbook!

Friday, July 27, 2012

BLT Cornbread Salad


Once, when it was my turn to bring salad to our supper club, I asked the host for his favorite ingredients. His reply? "Anything but lettuce!"

That comment hit home as I was not a big fan of lettuce myself and it made me realize I did like all the other things you could put in a bowl and splash with dressing.

Whether you like salad or not, I'm betting most of you can't resist a pan of warm cornbread right out of the oven. Hopefully, you have a pleasant memory associated with it, like your Grandma or a favorite restaurant that brings biscuits or cornbread to the table for starters.

Recently, I came across a dish that was not familiar but I felt should have been - cornbread salad. Now, I've seen people do pretty much everything with cornbread: soak it in a glass of buttermilk, dowse it with honey, crumble over a bowl of soup beans, even make a barbecue sandwich! But never in salad. Since I had made a loaf of Moonshine bread, which is a yeast-risen, flour and cornmeal mixture, with a kick of Virginia White Lightning in the dough, I thought it was a good time to try this recipe.


Essentially, cornbread is cubed and baked into sweet/savory croutons. Fifteen to 20 minutes at 425 with a hit of Broil at the end and mine were golden and crunchy.

While it may have fallen out of favor with the availability of so many artisan lettuces on the market, iceberg is my green of choice since it holds up under the pressure of heavier ingredients like these:


Since it's July and my local market is loaded with regional tomatoes and onions of all colors and sizes, they went in next, followed by crispy bacon bits that I cut with scissors and fry that way so I don't have to get my hands greasy, breaking it up later. Because this salad looks so traditionally American to me, that meant orange-y good cheddar cheese, as well. This version got topped with a homemade honey-mustard dressing that satisfied my love for the sweet and tangy.


Honey Mustard Dressing:
Whip together,
1/4 C mayonnaise
1 T yellow mustard
1 T honey
1/2 T lemon juice

For the salad,
1 head of very fresh iceberg lettuce, cut or torn into bite-size pieces
1 medium red or yellow tomato plus a handful of any variety cherry, grape or pear tomato
2 slices of cornbread of choice, cubed and baked at 425 for 20 minutes, tossing midway
3 slices of bacon, cooked crispy and crumbled
1 small red onion, sliced
Optional: 2 boiled eggs, cooled and sliced

This recipe fed 3 of us for supper! I hope you find a salad recipe you love, lettuce or no lettuce, and try making your own dressing, if you don't already.

Friday, June 29, 2012

LINKY PARTY via Foodie Friends Friday!

My pals at Foodie Friends Friday and I are having a party! Won't you join us? In honor of this day and of the day my little brother gets himself wedded in September, I made you a cupcake.


It's a chocolatey, rich and yummy cupcake with coffee in the batter and a swirl of cocoa frosting on top. What does this have to do with September weddings and Foodie Friends, you say? Well, this little cupcake just happens to be vegan! Just like the bride and groom, who are anxious to share the deliciousness of a plant-based way of life. So this Friday, I'm spreading the animal-free love.

If you're curious about baking without butter and eggs and all the usual suspects, give this recipe a try. Then give a cupcake to someone, let them ooh and aah over its gorgeous texture and flavor, then watch when you tell them it's vegan. "No way!" they'll say.

Read on for the recipe, which is courtesy of Chef Chloe, the vegan baker whose Ginger Nutmeg Spice recipe won Cupcake Wars.

Chocolate Cupcakes:

1-1/2 C all purpose flour
1 C sugar
1/3 C cocoa powder
1 t baking soda
1/2 t salt

1 C cold coffee or water
1/2 C canola oil
2 T white or cider vinegar
2 t vanilla extract

In large bowl, whisk together dry ingredients. In separate bowl, whisk together wet ingredients. Pour wet mixture into dry and whisk until just combined. Chloe admonishes not to overmix!

Fill cupcake liners two-thirds full and bake 16 to 18 minutes at 350. Cool completely and frost.

I used this Simple Vegan Icing from http://allrecipes.com/recipe/simple-vegan-icing/ and added 1/3 cup of cocoa.

1/2 C vegetable shortening
4 C confectioner's sugar
1/3 C cocoa
5 T soy milk
1/4 t vanilla

Beat shortening, sugar and cocoa until incorporated and clumpy. Add soy milk and vanilla, beat until smooth.

Pipe or spread onto cooled cupcakes, share, and voila, someone is likely to fall madly in love with you!

Now for more kitchen inspiration, please pay a visit to the following Foodie Friends and see what they're cooking up this happy Friday!

Robyn's View
A Lil' Country Sugar
Saucy Girls Kitchen
Passione Per Cucina
Everything In The Kitchen Sink
What's Cooking In The Burbs
Busy Vegetarian Mom
From Calculus To Cupcakes
This And That
Cookies, Cakes And Bakes
Cupcakes And Kale Chips
Wife Of The Colonel
Chef Picky Kid
Family Food Finds
Bringing Pleasure To The Kitchen
Cindy's Recipes And Writings
DJ's Sugar Shack


Friday, June 22, 2012

You had me at lemon and lavender!

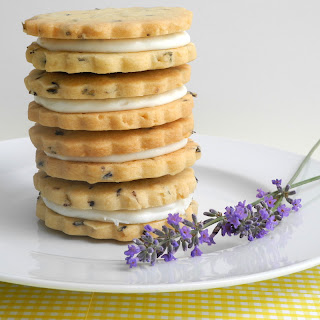
Meet Michelle:  Teacher, baker and creator of the blog, "From Calculus to Cupcakes." I was introduced to her over at Foodie Friends Friday, a wonderful recipe collective web page. These are her lemon lavender shortbread cookies:


One of my favorite treats is this herbilicious shortbread and Michelle has taken hers to the next level by adding a cream cheese filling. How delightful!

If you haven't eaten or tried cooking with lavender, I really hope you will. It intrigued me for sometime before I had a chance to use some locally-grown buds here in the Blue Ridge, and when I did, it was everything you can imagine. Floral, yes, but not overly perfume-y, and the addition of citrus is brilliant.

I recently purchased a half-pound of dried lavender buds for 11.49 via Amazon.com and they are lovely, delicately scenting the whole house when I opened my package. I make a delicious, rustic ciabatta-type bread using lavender and walnuts, but beyond culinary uses, you can also sprinkle the buds in bathwater for a relaxing soak.

I don't know how Michelle finds time to be a teacher, bake yummy shortbread AND write about it, but I'm glad she does. Check out her blog for more recipes of delicious treats like Teacup Muffins, homemade ice cream and lots more.

Happy Foodie Friends Friday, everybody!

Friday, June 15, 2012

This and That

Welcome to week 2 of my Foodie Friends Friday featured blogs! I was fascinated by Marlys' introduction of herself on "This and That" - "A little African, a little American and a whole lot Canadian." Being wholly inexperienced in 2 of those cuisines, I was drawn to her recipe for African sauce first. In the Capozzi-Speaks households, red sauce is something usually readily available or easily whipped up on short notice because we eat it often. As a result, we're always on the lookout for variations that we haven't tried.


Interestingly, Marlys' African sauce recipe starts the same my grandmother's marinara did - cooking the tomato paste in the olive oil. The addition of meat is also a (traditionally, when affordable) similarity. What I found intriguing was her inclusion of anise and ginger - exotic and alluring spices I probably would not think to serve on pasta but her suggestion of rice and beans went instantly on my to-make list (it's long and constantly shuffling but only the good stuff qualifies!).

If you're like me and want to know more about African cuisine and especially the region of Togo, check out Marlys' blog and follow her journey - lots of pictures included!


Friday, June 8, 2012

Foodie Friends Friday

Meet my newest blogging friends - web and Facebook pages put together by Tracy, aka Busy Vegetarian Mom - where foodie writers visit and talk about each others' blogs and recipes:  http://www.foodiefriendsfriday.com/

This week I was invited to check into Fit from the Inside Out, written by Anna, a 20-something college student. My first thought was that I didn't have much in common with Anna, aside from blogging about what I like to eat. She's much younger and has a much, much healthier approach to life. In fact, Anna does all those things I should be doing: eating lean meals, getting plenty of exercise and drinking lots of water every day. And she keeps a pretty good record of her efforts - maybe that's the key, something I should incorporate.


One thing I already do that Anna recommends (and tells you exactly how) is drinking "green" smoothies. Just throw a handful of spinach, kale or whatever you have on hand, into your usual fruit mix. I find that greens do not change the flavor of a smoothie and I have the comfort of knowing I've had a serving of nature's healthiest food before I even start the day.

So check out Anna's healthy blog and visit Foodie Friends Friday when you get a chance. And don't forget to drink your greens!

Sunday, April 22, 2012

Happy Sunday, baking friends! Have I told you about my new project yet? After years of working in and learning about the baking business, I'm making the leap - the lease is signed and my daughter, Laura, and I have set up an IndieGoGo account and we are looking to open our own cafe & bakery in my hometown. Here is the building, which was constructed in 1911, and is being lovingly restored by its current owner, Bob Poff:


We've got a little blog going about the venture, which we have decided to call Mockingbird Cafe & Bakery and you can read it here: http://mockingbirdcafebakery.blogspot.com/. Kirk Carter, a sweet and talented friend (whose work you can see more of at http://www.kirkcarter.com/), was kind enough to take lovely pictures of us and a few of our goodies:


If you live in southwest Virginia and would like to facilitate having a bakery nearby, you can help here: http://www.indiegogo.com/Mockingbird-Cafe-and-Bakery. There are great rewards if you do! Not only would you have our undying gratitude and affection, but $25 will earn you a cookie or cupcake a month for a year, $50 will keep you in goodies every week and $100 will get you a cake a month and an invitation to our friends and family grand opening party. Woohoo!

We hope you'll come see us when we open in June and meanwhile, enjoy Spring and give everybody you love a hug (or at least a cupcake)!

Sunday, April 15, 2012

Orange Cake


Just in time for Spring, this airy sponge cake makes use of tangy orange zest and a cup of fresh-squeezed juice.

I confess, I am usually very good at remembering, or at least recording, where I find recipes or whose take on a certain ingredient has inspired me. But I cannot for the life of me pinpoint where I found this gem, except to say that I was searching one day for a springtime dessert to accompany a Spanish-themed brunch. Apparently, in the region of Valencia, this is a popular cake that typically includes the use of ground almonds. I likely chose this version because no almonds gave their lives and it made mine much easier for their absence.

The ingredients are an uncomplicated lot:

2 large navel oranges
3 eggs
1 cup sugar
1/2 cup olive oil
2 cups all-purpose flour
1 tablespoon baking powder

I happened to have these lovely local eggs on-hand:


Directions:
Preheat oven to 350. Lightly grease an 8 or 9" round cake pan. Zest the 2 oranges and set aside, then squeeze the juice from both into a measuring cup and if necessary, add OJ or buttermilk to fill (yes, I add buttermilk to everything and this was an emergency maneuver the first time I made the recipe and it worked brilliantly).
Whisk the eggs until light and fluffy, then add sugar gradually, mixing well. Add orange zest and olive oil, beat or whisk some more, add orange juice and combine all thoroughly. Next, add flour a cup at a time and mix well before adding baking powder to finish.
Pour mixture into prepared pan and bake for 40 to 50 minutes, depending on your oven. Seriously, do the toothpick in the center test here.
When ready, take cake out and allow to cool 10 minutes before turning out on a rack or plate, as I did. Could that be any easier?

As you can see, a few seedless black table grapes found their way into this version. And they were yummy, adding a hint of juicy sweetness to the orange.


When the cake had cooled sufficiently (okay, just enough that it didn't collapse on itself when the knife hit it), I dusted it with powdered sugar and indulged.

Just look at that golden crumb!


I say - Welcome, Spring! And the new and exciting things that sometimes blow in on March winds and April showers. I hope you'll also visit me at my new blog and project Mockingbird Cafe and Bakery.

Tuesday, July 12, 2011

Wish You Were Here!

I'm not sure exactly how it happened, but I've been super busy, baking up a storm for the last month. I'm not complaining, mind you. There aren't many things I'd rather do with my time. But I do miss writing about it.


Things are starting to settle into a nice rhythm again, so I thought I'd share my breakfast with you. No, I didn't make it and there was absolutely no baking involved on my part. But it's still worth sharing.


Once a week, my mom and I make a buying trip to the Roanoke Sam's Club. I go through 50+ pounds of flour and an unmentionable amount of butter in 7 days or less, which makes the trip necessary. This spring, we fell into a lovely routine of stopping at a local spot, Hale's Restaurant, for either breakfast or lunch, depending on how our day was going. Their exact address is 7643 Roanoke Road, Shawsville, Virginia, but we locals think of it as being on old Route 11 - a pretty, scenic byway, still dotted with these:


Now, over the years, I've gotten respectably good at cooking eggs. I've even learned how I like them - over medium, please, with some runny yolk but never, ever any liquid in the white. And being Southern girls, I like gravy with my biscuits and my mom likes slices of tomato on her plate.
Hale's has all this - the absolutely perfect fried egg you see above - as well as engaging staff, potatoes with onions chopped by humans and not machines, sunny window seating, a menu that doesn't quit, and mountain views (you already know I like mountains). Even on a rainy day, look how pretty they are.
Speaking of pretty, this is my breakfast companion and seasoned traveler, Barbara.
She knows what's good and she survived raising four of us. That deserves a good breakfast, IMHO.


Of course, I never gave her any trouble. And was definitely her favorite.


If you're close enough to the Blue Ridge and find yourself needing sustenance, give Hale's a try. Their burgers and fries at lunch are also killer and they have beans and cornbread on the menu.


And if you're looking for a swell vacay spot, just down the road apiece (7 miles, to be exact) is one of the best attractions you'll ever want to visit - Dixie Caverns. I kind of like how everything looks pretty much the way it did when I went there for a field trip in fourth grade.
On days like today when it's about 100 degrees outside, you should know that cavern temperature hovers at 30 degrees cooler. Tempting, no?


You can also replenish your stock of giant pencils while there.
And get a few of these for the kids:
And maybe a few of these:
Go here for information about their exact location and hours: http://www.dixiecaverns.com/. They also have a pottery shop and campground. That field trip remains a highlight of my school career where the rock formations were like living geological history and crack-open geodes from the gift shop prolong the memory.


Now that I've had a good breakfast and stocked up on flour, you'll have to excuse me because it's time to get baking again. This summer, I hope you find your way to Hale's or a good meal by a window in your neck of the woods, and have some fun in a cave, a river or wherever you like to make happy memories with your peeps.

Monday, May 23, 2011

Eat the Market

I confess.  I've been AWOL for a few weeks.  But I have really good reasons - like Springtime and fresh produce and baking up a storm and meeting really great folks who know what to do with good bread.


This past winter was a long one and I don't know about you, but when the first tulips pushed their way up and out in the open, the world suddenly seemed full of light again.  And now that the farmer's markets have reopened, fresh produce from not-too-far-away is available and a bargain.


This year, I'm fortunate to be a vendor at a new local market inside the Draper Mercantile, a lovingly restored spot near Claytor Lake, in the rolling mountains of Virginia.  Check it out at www.DraperMerc.com.  The structure is possibly pre-civil war era (there are varying accounts) and has a rich history of providing local residents a venue for buying and selling their staples. Walking through the big blue front doors, there's a sense of being at two stops along the space-time continuum at once.
There's a wide front porch with rockers, polished wood counters, heartbreakingly good music, local fresh produce and seriously, the nicest people you'll ever want to meet.
And, did I mention, European-inspired bakery?
Recognize those happy ciabatta?  Here's the recipe if you want to make some - http://cafeblueridge.blogspot.com/2011/02/how-i-learned-to-stop-worrying-and-love.html - 
or just hit me up at the market and I'll save you the work.


So yeah, I not only get to shop the farmer's market but it's how I make my living these days. Or at least part of it.  The really good part.  Here's something I'm making this week.
Oui, French macaron.  I bet you thought those were only available in places with metro stops.


Now, the only problem with all those gorgeous fresh fruits and vegetables and bread is that sometimes after I've stocked up on what I know is good, and good for me, I'm not entirely sure what to do with it.  If you have this dilemma, let's share some ideas.  I've got a few but I'd love to hear yours.


This week, when baby lettuces put in an appearance, I'm mixing up a tangy Italian vinaigrette of red wine vinegar and olive oil - but use your favorite - and serving the salad atop this remarkable rosemary flatbread from www.smittenkitchen.com.  The bread can be the plate, see?  It's handy, like fast food, only your body actually wants you to eat it.


Now, the recipe:

Crisp Rosemary Flatbread
Adapted from Gourmet, July 2008

1 3/4 cups unbleached all-purpose flour
1 tablespoon chopped rosemary plus 2 (6-inch) sprigs - I used dried needles, broken up in the food processor, which smelled brilliant!
1 teaspoon baking powder
3/4 teaspoon salt
1/2 cup water
1/3 cup olive oil plus more for brushing
sea salt


Preheat oven to 450°F.  They suggest preheating a baking sheet in the oven, for sliding the flatbread onto when it's ready for the heat.  I have stones on one rack of my oven and they worked well, having shaped the bread on parchment and sliding it onto the hot stones to bake.
Stir together flour, chopped rosemary, baking powder, and salt in a medium bowl. Make a well in center, then add water and oil and gradually stir into flour with a wooden spoon until a dough forms. Knead dough gently on a work surface 4 or 5 times.  Their instructions say to work in 3 pieces, baking one at a time, but as you can see, I just flatted out the whole thing onto one piece of parchment and slid it onto my oven stones.  Lightly brush top with additional oil and scatter small clusters of rosemary leaves on top, pressing in slightly. Sprinkle with sea salt.
Slide the round (still on parchment) onto preheated baking sheet or stone, and bake until pale golden and browned in spots, 8 to 10 minutes. Transfer flatbread (discard parchment) to a rack to cool, then make 2 more rounds (1 at a time) on fresh parchment (do not oil or salt until just before baking). Break into pieces.  I would totally top the dough like a pizza and bake, as well.

When I tasted the fresh-baked flatbread, my first thought was, "I'm never buying crackers again."  But you can bake it crisper or softer, depending on your need that day. The sea salt and rosemary are lovely and the finished bread is like a palette, just made for decorating. Today, I used the fresh greens on one piece, and on the others, some leftover red sauce and a bit of pesto that looked longingly at me from the fridge.  And then I ATE IT FOR BREAKFAST. Seriously.
This Saturday, check out what's fresh in your neck of the woods and if you run out of recipes or come up with some new ones, let's chat.  Meanwhile, just remember to eat the market.  Your body will thank you and you'll probably meet some very lovely people along the way.

Monday, May 9, 2011

Strawberry Rhubarb Pie Throwdown


If you ever find yourself humming, "Gonna make a pie with a heart in the middle," chances are you've seen the movie "Waitress" with Keri Russell.  Besides having everything I desire in a film - Nathan Fillion and pie - the screenplay is sweet and especially poignant and speaks to mothers and daughters everywhere.


I'm incredibly fortunate to have a daughter and as well, one who bakes a pretty mean pie.  For Christmas, she did indeed give family members little pies with hearts cut out in the middle, exposing their rhubarb and strawberry goodness.  When, by New Year's, everyone was raving about those pies, I figured there must be something to this rhubarb, which I confess I had never tried.  In my youth, we had a giant plant in the yard but it seemed like one of those things your grandmother ate - anathema then, but now, it turns out, Grandma knew what was good!


If you know anything about gardening, you know that rhubarb isn't fresh at Christmas time but like most fruit, the frozen kind works very well.  Here's what rhubarb looks like in early Spring - in fact, it's one of the first plants to wake up from Winter.


Now, my daughter and I are not competitive about our baking.  We like to share tips and tricks and truth is, she got me my first job in a bakery.  So when we were invited recently to do a pie throwdown, the competition was very lighthearted.  Doing it at my very favorite local coffee shop, Lucie Monroe's, a bonus.


Curious to know whose pie reigned supreme?  Well, as the wise lady on the left, judge and local Tomato Queen Juliet Roma, remarked, "I'd like to have B's filling in A's crust."


Clearly, Tomato Queens have to be very diplomatic.


But judges' choice and overwhelming crowd favorite in the end was Laura's beautifully filled pie with the hand-fluted crust.  It was sweet and luscious and had just the right consistency when sliced and held up to bite.


My go-to pie is typically more of a rustic galette - French, I believe, for "easy as pie."  I confess, my initial plan to use dandelion syrup as a secret ingredient was not such a wise choice.  There's already almost too much liquid in strawberries and rhubarb.  Hence, following Laura's route with the cornstarch is a good bet.  But I do have a no-fail pie crust, discovered long ago in my Cuisinart food processor cookbook, that's ready in 60 seconds.  In fact, if it takes you longer, you've already messed it up.  Sorry.


Taking a cue from the judge, here's Laura's pie in my crust.  If you want to know more, you'll have to hunt her down at Bollo's in Blacksburg, where she bakes deliciously statuesque scones and muffins, among other things.


In Laura's own words, boil a minute or two until thickened:
2 C fresh/frozen rhubarb
1 pint fresh strawberries
3 T cornstarch
1/4 C honey
1/4 C lemon juice
1-1/4 to 1-1/2 C sugar, to taste
2 tsp rosewater, if available
1-1/2 tsp cinnamon - wish I'd thought of that!
1/2 tsp nutmeg
lemon zest or extract, to taste


"Bake until crust seems done, 30-40 minutes.  But I definitely boiled it then baked it, I think that's crucial, not just boil then pour into an already baked crust.  Also, I boiled the fresh rhubarb from the beginning, then when I realized it sorta disintegrated, I added some frozen at the very end."


Laura and her prize-winning pie, along with judge Nikki who gets to create yummy things with her mother, Dawn, at Lucie Monroe's.  Aren't they adorable?


Donna's crust recipe:


Ingredients:
3 C plain flour
1/2 tsp salt
1/4 tsp baking powder
16 T or 2 sticks of chilled unsalted butter
2 T vegetable shortening
5-8 T ice water


I use the plastic blade of the food processor despite the company's instruction to use the metal one.  Additionally, if you happen to have pastry flour on-hand, it makes for an even more delicate crust.


Otherwise, follow Cuisinart's directions to the letter and you won't be disappointed:  Process the flour, salt and baking powder to sift, 10 seconds. Add the well chilled butter and shortening. Use short rapid pulses until the mixture resembles coarse corn meal and no pieces of butter larger than a “pea” remain visible, 15 to 20 pulses. Sprinkle half the maximum ice water on the flour and butter mixture, then pulse 5 or 6 times. The dough will be crumbly, but should begin to hold together when a small amount is picked up and pressed together. Sprinkle on more water, a teaspoon (two for the two-crust recipe) at a time, with 2 to 3 quick pulses after each addition, adding just enough water for the dough to hold together easily when pressed into a ball. Add the liquid sparingly so that the dough is not sticky. Do not over process or the pastry will be tough, not tender and flaky.

Turn the dough out onto a lightly floured surface. Press together into a ball, then flatten into a disk about 6 –inches in diameter (two disks for the two-crust recipe). Wrap in plastic wrap and refrigerate for 1 hour before continuing to allow the glutens in the flour to rest. The dough will keep refrigerated for up to 3 days, or may be frozen (double wrapped) for up to a month, thaw at room temperature for an hour before using. 


I used about half this recipe for my contest entry, meaning you can easily get 2 to 3 pies per batch.


Using the technique above, after chilling your disk of dough, roll it out on parchment paper into about a 1-foot circle.  Move the parchment and dough onto a baking sheet and add Laura's delicious filling, mounding up a bit in the middle and spreading out to within 2 inches of the edge.  Fold the edges up around the filling and brush with egg wash, sprinkling with sugar, if desired.  My pie took about 45 minutes at 375 and it's nice that at the higher heat, the crust will bake without becoming soggy, and give that rustic golden finish.


A final word about rhubarb - make sure that if someone besides yourself mows your lawn, you tell them what the plants look like.  Or that you have plenty in the freezer if you're planning to enter a pie contest.

Friday, April 29, 2011

Minty Dog Treats


Dogs like treats.
Dogs like people.
Sometimes people do very nice things for each other, and dogs like to be included.
Today is one of those days.  On the campus of nearby Virginia-Maryland Regional College of Veterinary Medicine, AKA the vet school, the American Cancer Society is holding its annual Bark for Life event from 5 to 7:30, to raise money and awareness.  I'm already pretty aware of cancer - way more than I wanted to be - and I definitely love dogs, so I baked these tasty cookies for the hardworking participants.


They've got mint for fresh breath, parsley for joint pain and garlic to support the immune system while making things unpleasant for fleas.  There's whole wheat flour and oats, with just a bit of oil, so they're not going to pack on the pounds or fill your pet up with processed who-knows-what.


Also, they're Gunnar-tested and approved.


Many thanks to the folks at http://www.all-natural-dog-treat.com for the recipe.  I typically use dried mint and parsley, in half the amount their recipe specifies.


Ingredients:
1 T veg. oil
1 C water
2-1/2 C whole wheat flour
1/2 C oatmeal
1 T dried spearmint
2 T parsley flakes
1/4 t minced garlic


Just mix it all up in your mixer or by hand. Turn the oven on 350.  Roll the dough out on a floured surface like you're making Christmas cookies, to the thickness your puppy likes (Gunnar prefers crispy but will not turn his nose up at thicker treats - just not too heavy or they don't dry nicely for storage).  Cut into desired doggy-related shapes and place on lightly sprayed pan to bake for 35 minutes or so.  I usually turn the oven off at this point and let them sit for an hour or more.  Again, the crispier they are, the longer you can store them, up to a month in a container on the shelf or longer in the freezer.  They smell strangely wonderful, too.


Today I doubled the above recipe and got a little over 6 dozen.


OK, I left a cat in the picture.  He was feeling left out.  Here are some more dogs.


Wednesday, April 20, 2011

Cookies and a Movie


As a student of Buddhism, I allow that change is one of life's certainties.  But here's another - a savory, nostalgic, cinematic certainty.  The Star-Lite Drive-In.


Having occupied its niche of the Blue Ridge since 1953, with bright neon sign, bulky metal speakers and retro snack bar standing guard, the Star-Lite is getting ready to start another season.


In support of the upcoming Memorial Day opening weekend, loyal Facebook fans gathered recently for the 2nd annual clean-up day.

Since a previous engagement also known as my paying job prevented me from attending, I baked these cocoa-rich shortbread stars to fuel the volunteer spirit.

The recipe is from Hershey, of course, and has just a few ingredients, being a shortbread cookie.  I had to wonder at their designation of advanced skill level, though. It's definitely easy and could be even simpler by baking in the traditional shortbread round!

Cocoa Star-Lite Cookies

Ingredients:
1 stick of butter, softened
1 tsp. vanilla extract
1-3/4 C plain flour
1-1/4 C conf. sugar
1/2 C cocoa

Directions:
Heat oven to 300 degrees.  Cream the butter and add confectioners sugar and vanilla, betting until creamy.  Add cocoa, blending well before gradually adding flour, stirring until smooth.

Roll out onto floured surface, about 1/4" thick and cut into shapes.  The butter in shortbread precludes having to grease the pan.  Bake 15 to 20 minutes, until firm.  Cool slightly on baking pan before moving to wire rack and cooling completely.  I got 2 dozen stars from this recipe and enough dough into the freezer for an easy round sometime in the future.


Now that clean-up day is done and Memorial Day will be here before you know it, make plans to take your kids, your sweetie or your BFF out for a movie under the stars.  Bake some cookies, pack a picnic, or plan to hit the snack bar for the Best Chili Dog You Will Ever Eat, along with fresh popcorn, hot fries and a soda.  If that doesn't tempt you, look at the prices:

When I was a kid, Mr. Beasley, whose daughter Peggy now operates the Star-Lite, would always greet us at the gate.  He seemed to look over our family of 6 and come up with what he thought was a fair total.  Even in my young mind, his multiplication always landed in our favor. Some years later, my little brother spent a hot summer there, throwing dogs together at an unimaginable pace.  Folks still slip in during the film, just to get supper and be on their way.

Today, Karen Clark Nagy organizes the Star-Lite Facebook fan page, where you can get showtimes and movie information.  Check it out and I'll see you there this summer.  I might even share my cookies.  But not my hot dog.